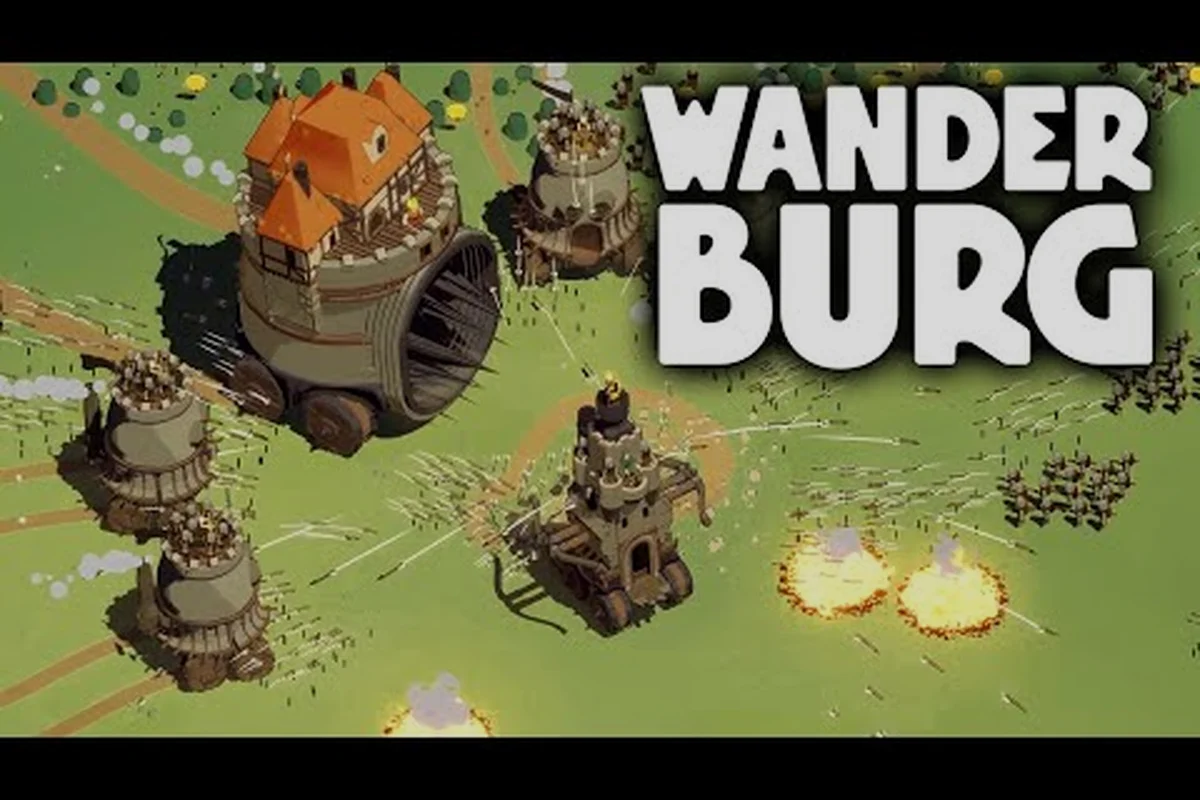
A solid Wanderburg beginner guide gets you from a stationary castle shell to a fully rolling siege engine in under an hour, because the demo's loop — devour, build, and roll on — is deliberately short so you can taste every module before Early Access opens. According to the Wanderburg page on Steam, Early Access kicks off September 8, 2026, which makes the current demo the single best training ground for the full release. This Wanderburg game guide walks you through controls, the core consume-and-grow rhythm, your first module choices, and the village-devouring sequence that defines every run.
The demo gives you a sandboxed chunk of the full game with the same core loop, the same castle-on-wheels movement model, and a representative slice of the module system. Randwerk built the demo so that new players can finish a run in roughly 20–30 minutes, which is fast enough to learn the systems through repetition without burning an entire evening. If you are looking for a wanderburg demo guide, treat the next sections as a checklist to clear before your first full Early Access session.
Core Loop, Controls, and Your First 10 Minutes
The loop in Wanderburg is brutally simple: roll into a village, consume it, harvest its resources, slot new modules into your castle, and roll toward the next target. Every step feeds the next, and the demo front-loads the most satisfying versions of each step so you can feel the progression curve before the difficulty ramps up.
Controls and Input Options
Wanderburg supports mouse, keyboard, and controller, all of which the official store page confirms as fully playable from minute one. The default bindings are designed around a one-hand-on-mouse, one-hand-on-keyboard layout, but the control feel translates cleanly to an Xbox or PlayStation pad for couch play. If you are coming from a real-time strategy or tower-defense background, the mouse-and-keyboard combo will feel immediately natural; if you prefer the lean-back experience, the controller maps dodge, aim, and module-fire onto the triggers and bumpers with minimal learning curve.
| Input | Move Castle | Aim Modules | Fire Modules | Camera |
|---|---|---|---|---|
| Mouse + Keyboard | WASD | Mouse cursor | Left click / Space | Mouse edge scroll |
| Controller (default) | Left stick | Right stick | Right trigger | Right stick (held) |
| Controller (legacy) | D-pad | Right stick | A / X | Numpad mimic |
The mouse edge scroll trick is worth practicing because it doubles as your macro map awareness — you can survey incoming enemy groups while your modules keep firing on auto-target. For a deeper walkthrough of input remapping and comfort settings, the Wanderburg controls and build primer covers the same bindings in a step-by-step format.
The Three-Phase Run Structure
Every Wanderburg run — demo prologue or full 18-minute match — breaks into the same three repeating phases: scout, devour, and grow. Learning to recognize the phase boundaries by their on-screen cues (the map overlay fading out, the consume animation triggering, a new module slot lighting up) lets you plan your opening moves with intent instead of improvising under pressure, which is exactly what most first-time captains get wrong on the Wanderburg beginner learning curve.
-
Scout phase (0–3 min): Roll out of your starting tile and read the map. Each biome surfaces two or three villages, an artifact shrine, and a wandering mini-boss. The community calls this "the breathing room" because no villages attack during this window.
-
Devour phase (3–12 min): Pick a village, drive over it, and trigger the consume animation. Your castle absorbs its core, gaining size, mass, and a small resource payout that funds your next module.
-
Grow phase (12+ min): Slot a new module, push toward a tougher village, and start trading with the artifact shrine you spotted during scout phase.
Repeating this triangle is the entire game, but the variables — which village to hit first, which module to slot, which artifact to chase — are where decision-making actually lives. According to the official Wanderburg site, the tagline "Survival of the Biggest" is the literal design intent: bigger castles survive longer, so every choice should answer the question "does this make me bigger, faster, or tougher?"
Modules, Weapons, and Your First Build
Wanderburg's modular progression system is what turns a generic rolling castle into a personalized siege engine. The demo lets you unlock roughly a third of the full module roster, and the choices you make in those first runs shape the kind of player you will be when Early Access drops.
Module Categories and What They Do
Every module slots into one of three categories, and each category answers a different question about your build identity. Picking at least one from each category is the fastest way to feel the kit come alive, because the modules interact in surprising ways — a Ballista on top of a Grapple Hook base, for example, lets you pull a fortification into close range before peppering it with bolts.
| Category | Role in Build | Demo Examples | Unlock Source |
|---|---|---|---|
| Weapon | Direct damage and crowd control | Ballista, Flamethrower, Ram | Villages, captain drops |
| Utility | Movement, reach, and positioning | Grapple Hook, Bridge Plank, Smoke Screen | Shrines, biome chests |
| Defense | Durability and crowd resistance | Reinforced Plate, Spike Strip, Repair Drone | Elite villages, bosses |
The category rule of thumb from the Wanderburg reveal trailer is that your castle needs at least one weapon module to break through fortified villages, one utility module to keep your rolling speed competitive, and one defense module to survive the late-game counter-attacks. Skipping any of the three categories leaves a glaring weakness that experienced players will exploit immediately.
Your First Village: A Walkthrough
The first village you roll into in the demo is intentionally a tutorial-grade target. It has one watchtower, two archer posts, and a small resource core sitting in the town square. Community testing on the Wanderburg subreddit confirms that the first village caps at roughly 200 HP of resistance, which any starter module combination can chew through inside 90 seconds. The trick is not raw damage — it is positioning.
Roll in at an angle, park one edge of your castle against the watchtower to bait the archers into a single firing line, and unload your modules into the resource core. The core explodes, the village converts into a glowing tile, and your castle physically grows by one segment. That visual feedback is the single most satisfying moment in the demo, and the moment most players screenshot.
Devouring Villages Faster: Movement, Mass, and Targeting
Once you have cleared your first two villages, the question shifts from "can I eat this" to "how fast can I eat three of these in a row." This is where Wanderburg separates casual players from the leaderboard crowd, and the answer is almost always about movement and mass rather than raw damage output.
Mass, Momentum, and Why Bigger Is Better
Mass is your single most important stat in the early game, because it determines two things simultaneously: how much damage you deal on contact, and how resistant you are to being knocked off course by enemy rams. According to community data shared on Reddit, each consumed village adds roughly 8–12% mass to your castle, and the diminishing returns only start kicking in after your sixth village in a single run.
| Castle Size | Villages Consumed | Bonus Damage | Knockback Resistance |
|---|---|---|---|
| Tier 1 | 0–1 | 100% | Low |
| Tier 2 | 2–3 | 115% | Medium |
| Tier 3 | 4–5 | 135% | High |
| Tier 4 | 6+ | 160% | Very high |
The practical takeaway is that chaining villages back-to-back is mathematically better than clearing a biome and then retreating to upgrade. Each village you add to your chain raises the floor for the next one, and the compounding bonus is what makes the late-game "Tiers" feel unstoppable. A wider breakdown of vehicle-specific scaling lives in the Wanderburg vehicle comparison guide, which maps each chassis to its optimal village chain.
Targeting Priorities in Larger Villages
By your third village, you will run into fortified compounds with two watchtowers, a ballista nest, and a healing shrine that regenerates the resource core if you do not destroy it first. The community calls this the "shrine problem," and it is the most common reason first-time players stall out mid-run. The fix is a targeting order you can memorize in a single playthrough:
-
Shrines first: They regenerate the core, so leaving them alive means your damage never sticks.
-
Watchtowers second: They deal the highest single-target damage to your castle.
-
Archer posts third: They hurt, but they die fast and rarely crit.
-
Resource core last: Once the support structures are down, the core melts.
A Wanderburg how-to-play tip that experienced players swear by is to assign a single module — usually a Flamethrower or a high-rate Ballista — to shrine duty. Letting auto-target handle the core while you manually point a module at the shrine is the difference between a two-minute clear and a five-minute slog. This pattern repeats in almost every speedrun clip on YouTube, and it is the single biggest habit to build in the demo.
Between Runs: Artifacts, Captains, and Persistent Progression
Wanderburg is a roguelike, but the meta-progression between runs is generous enough that even a bad run leaves you with something useful. The two systems worth understanding before Early Access are artifacts (gear you find inside runs) and captains (persistent characters with their own level curves).
Artifact Tiers and Where to Find Them
Artifacts are equippable items that drop from elite villages, biome bosses, and the rare glowing shrine. Each artifact has a tier from I to IV, and the tier roughly correlates with the biome you find it in. Community testing suggests that Tier III artifacts start appearing in your third biome transition, which is also when most players unlock the Captain's Forge for the first time.
| Tier | Drop Source | Stat Range | Rarity |
|---|---|---|---|
| I | Common villages | 1 small bonus | Frequent |
| II | Elite villages | 1 medium bonus | Uncommon |
| III | Biome bosses | 1 large + 1 small bonus | Rare |
| IV | Endgame captains | 2 large bonuses | Very rare |
The wanderburg tips and tricks veterans share most often center on artifact-hunting routes, because the right Tier II artifact on a Tier II captain is usually stronger than a Tier III artifact on a starter captain. If you want a full breakdown of artifact-caption pairing, the Wanderburg meta and endgame primer goes deep on optimization math for the post-Early Access crowd.
Captains and Why They Matter
Captains are persistent characters you unlock by completing specific demo challenges — clearing a full biome without dying, devouring 10 villages in a single run, or defeating a specific mini-boss without losing a module. Each captain starts at level 1 and gains XP across every run, even failed ones, so the early unlock grind pays off long-term.
The Wanderburg reveal trailer shows three captains: a frontline Warden with bonus HP, a sniper-style Marksman with bonus range, and a support Engineer with bonus module cooldown reduction. Demo progress reports on the subreddit suggest the full Early Access release will launch with at least eight captains, so the meta layer is deeper than the demo makes it look.
Demo-to-Early-Access Transition: What to Practice Now
With Early Access opening September 8, 2026, the demo window is your training ground for roughly the next 24–48 hours, and what you grind in those two days carries directly into your first session since carryover progression, recipe unlocks, and shop inventories persist across the transition. Treat the demo as a scaled-down tutorial of the real game loop: prioritize establishing a stable gold income route (usually a wheat → flour → bread chain on Day 1–2), then push into a single early-game artisan building like the Bakery or Tailor's Shop so your build order is already muscle memory. Practicing the right things now means your first Early Access session feels like a continuation, not a restart, and you'll skip the 1–2 hours of relearning that players who ignore the demo typically lose.
Skills to Drill in the Demo
The demo's four-biome loop is a compressed training ground: every habit you build during those 16-20 minute runs transfers directly into the Early Access biome progression, where mistakes cost full-run resets instead of a quick "restart biome" button. Because the same biome tiles, enemy waves, and shrine placements cycle on repeat, you can isolate a single skill per run — chain timing on biome 1, module swaps on biome 2, shrine priority on biome 3 — and actually measure improvement across attempts. Three skills pay off disproportionately, and the next three entries break each one down.
-
Village chaining: Practice rolling from one village directly into the next without stopping. The animation cancel window is tighter than it looks, and the demo is the only place to learn it without losing a run.
-
Module hot-swapping: You can swap modules between phases for free in the demo, but Early Access will charge a small resource cost. Use the demo to memorize which modules you actually swap between and which stay locked.
-
Shrine targeting: As mentioned earlier, shrine priority is the single most important combat habit. Drill it until you do not have to think about it.
A wanderburg game guide is only useful if it matches what the game actually rewards, and the current demo rewards aggressive chaining, decisive targeting, and module variety. Players who over-specialize tend to stall at the second biome, while players who mix categories clear all four demo biomes on their first sitting.
Early Access Expectations
According to the official Steam page, Early Access will add at least three new biomes (desert, tundra, and a swamp variant), a vehicle unlock system, and a captain-versus-captain arena mode. The Wanderburg biome roster preview already maps the early-access biome order and the unlock conditions for each one, so it pairs naturally with this guide if you want a forward-looking look at where your demo skills will land.
For broader community wisdom that complements the mechanics above, threads on the Wanderburg subreddit collect player-reported strategies that often surface a week or two ahead of official patches, and the Splattercatgaming Wanderburg demo deep dive shows the core loop in 28 minutes of unbroken play. Both are useful references once you have the basics down and want to push into speedrun territory.
Frequently Asked Questions
How do I play Wanderburg as a complete beginner?
Start the demo, ignore artifact optimization, and focus entirely on the core loop: scout, devour, grow. Use the mouse-and-keyboard layout if you come from a strategy background, or the controller layout if you prefer a more relaxed pace. The first two villages are tutorial-grade, so treat them as a chance to learn the controls before the difficulty curve kicks in.
What is the best Wanderburg beginner build in the demo?
A balanced Ballista + Grapple Hook + Reinforced Plate loadout is the most forgiving setup because it covers all three module categories. The Ballista handles direct damage, the Grapple Hook keeps your positioning flexible, and the Reinforced Plate buys you the few extra seconds you need to clear a fortified village on your first attempt.
How fast can I devour my first village in Wanderburg?
A clean, no-resistance first village takes roughly 60–90 seconds once you know the targeting order. Speed-runners on the subreddit have posted sub-45-second clears using a fully upgraded Flamethrower and a forward-roll approach, but that timing assumes you already have Tier 2 mass from a previous village, which is not possible on your very first target.
Should I play the Wanderburg demo or wait for Early Access?
Play the demo now, because the core loop is identical to the full release and the demo's short run length makes it the fastest way to learn the systems. Waiting for Early Access means re-learning the controls and module kit on a harder map, which is a steeper curve than the demo's sandboxed biomes.
Does Wanderburg support controller play?
Yes. The official Steam page lists full mouse, keyboard, and controller support, and the controller layout maps movement to the left stick, aiming to the right stick, and module firing to the right trigger. The only comfort setting worth tweaking right away is the aim sensitivity, because the default feels fast for newcomers who are still learning the camera scroll.