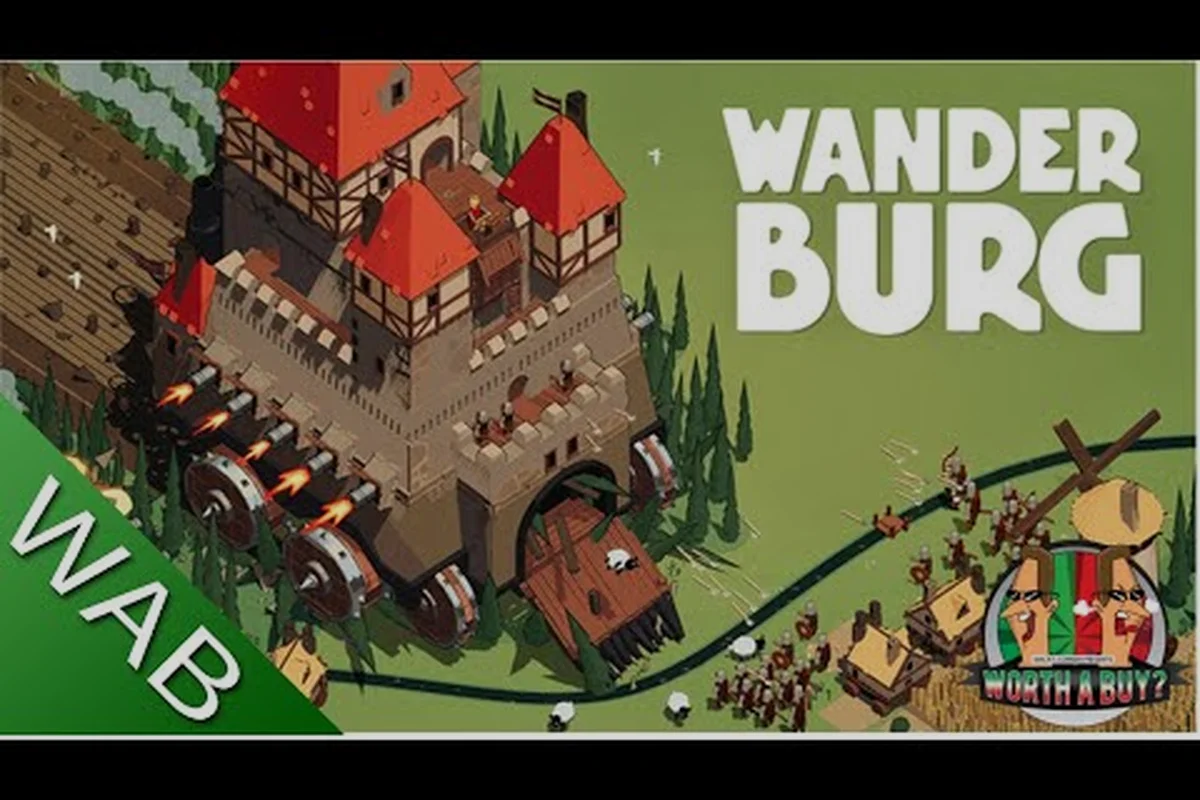
Wanderburg survival tips start with one brutal truth: your castle is small, your wheels are slow, and everything on the map can kill you before the first biome transition. According to the Wanderburg on Steam listing, the game is a "minimalist medieval roguelike about driving a castle on wheels" where you "devour entire villages, build your modular arsenal of siege machinery and grow with every stronghold you crush." Learning how to survive in Wanderburg comes down to mastering the consume-to-grow loop, sequencing module upgrades, and avoiding the early-run traps that end most captains before they hit the second biome.
This guide breaks down the survival priorities that separate a wiped run from a snowballing fortress: the order in which to consume villages, the modules to prioritize when your castle is still tiny, the resource decisions that actually matter, and the mid-run pivots that let you win instead of barely scraping by. Whether you are still in the Early Access demo or pushing through the hardest biome, the principles below come from the official Wanderburg website and community-reported strategies on r/WanderburgGame.
Why Survival in Wanderburg Feels So Different From Other Roguelikes
Wanderburg is not a souls-like, not a deckbuilder, and not a traditional top-down shooter. It is a moving-fortress roguelike where the "player character" is the castle itself, and growth is your only reliable defense. The faster you internalize that fact, the faster your runs stop dying in the first fifteen minutes.
The Core Loop: Consume, Grow, Snowball
Every run follows a tight feedback loop. You roll through a procedurally generated map, find a village or a smaller castle, eat it, gain mass and module slots, then use your new size to take down bigger targets. According to the official Steam page, the "modular progression system expands your moving fortress with new siege modules and structures" as you "devour entire villages." That sentence is the entire game in one line.
The loop has three phases — consume, grow, snowball — and confusing the order is the single most common reason new captains die. Most beginners instinctively enter the mid phase with a half-eaten map: they push for fortress fights before stockpiling villagers from the first 2–3 villages, leaving them one-shot by biome enemies in the 0–10 minute window. Treat consumption as a hard gate, not a suggestion — every early-game death traceable to a captain who tried to fight a camp before reaching 1,200 mass and at least two siege modules.
| Phase | What Happens | Main Risk | Survival Priority |
|---|---|---|---|
| Early Run (0–10 min) | Tiny castle, 1–2 modules, no villagers | One-shot from biome enemies | Consume the first 2–3 villages immediately |
| Mid Run (10–25 min) | Mid-size castle, 3–5 modules, first artifacts | Overextending into fortress fights | Push module upgrades, avoid elite camps |
| Late Run (25+ min) | Large castle, 6+ modules, snowballing | Resource starvation before biome boss | Stockpile consumables, bait boss to open terrain |
What "Survival" Actually Means Here
Survival in Wanderburg is not about dodging attacks frame-by-frame. It is about reaching the second biome with enough mass to threaten the first biome boss. Players who understand this stop wasting time on tiny resource nodes and start hunting villages as their primary objective. A "wanderburg how to survive" mindset is really a "wanderburg how to grow your castle faster than the difficulty curve" mindset, and that reframing changes every decision you make on the map.
The First Ten Minutes: How to Survive the Early Game
Early-game survival in Wanderburg is decided in the first three village consumes. If you get those right, the rest of the run opens up. If you get them wrong, you are fighting biome enemies with a starter castle and no momentum.
Pick Your First Target Carefully
When the run begins, your castle is small and your wheels are slow. The first village you consume should be the closest one with the fewest defenders, not the largest one on the horizon. According to community reports on the Wanderburg subreddit, new captains consistently lose their first run by chasing a high-value village across two biome screens and getting caught in an enemy patrol. The safer play is to eat the first village you can reach, no matter how small, because the mass and module slot it gives you compound on every subsequent fight.
Three Things to Do Before the First Village
These three early decisions form the foundation of every successful wanderburg run because they directly determine your castle's growth trajectory and survivability across the first two biomes. Skipping the module loadout check, for example, leaves you with a starter castle that cannot crack even tier-1 village walls before the consume window expires, while ignoring biome edges means you walk blind into difficulty spikes. In practice, top-runners treat the first thirty seconds as a planning phase rather than a movement phase, because how to survive the early game in wanderburg hinges on these calls more than any mid-run reaction.
-
Check your starting module loadout. Some modules are defensive (rams, armor plates) and some are offensive (catapults, ballistae). For a first run, prioritize one offensive module that lets you break village walls fast, because a faster first consume means more time for a second and third.
-
Identify the nearest biome edge. Knowing where the next biome begins tells you how long you have to consume before the difficulty curve shifts. Per the official store description, the game features "rolling through different biomes across multiple difficulty levels," so biome transitions are real escalation points.
-
Avoid elite camps entirely. Elite camps are mid-game content. A starter castle cannot break their walls and will take massive damage trying. Skirt around them and come back later with a bigger fortress.
The 3-3-2 Rule for Early Consumes
Community-tested strategy recommends the "3-3-2 rule" for the first ten minutes: consume three villages in the first biome, grab three module upgrades from consumed structures, and ignore the two most obvious resource nodes that look tempting but waste time. The exact numbers are flexible, but the principle is fixed: front-load your growth before you start fighting fortresses. This is the foundation of any "wanderburg how to win a run" strategy, and it is the reason experienced players never linger in the first biome longer than necessary.
Growing Your Castle: How to Consume Villages and Modules
Once the early game is stable, the run becomes a question of how to consume villages efficiently and which modules to stack. The fastest route is to claim villages in clusters of 2–3 along a single direction so module paths share terrain, then prioritize Pop-Growth and Wood-Yield modules before adding any combat-oriented ones. Stacking only one module type (e.g., four Pop-Growth in a row) multiplies its per-tile bonus, while mixing module types dilutes the returns — a common mistake players make right after stabilizing. This is where Wanderburg stops being a survival game and becomes an optimization puzzle.
The Mechanics of Consumption
To consume a village in Wanderburg, you must first break its outer defenses (walls, towers, or barricades) and then roll over the central structure with your castle. Smaller villages fall in one or two module volleys; larger ones require sustained damage while dodging counter-fire from garrisoned defenders. The faster you break a village, the less damage you take, and the less repair time you spend sitting still.
The official Wanderburg website describes the fantasy as "consume, grow bigger, upgrade your modules, and survive" — that order is the gameplay loop in four words. Breaking walls is offense, rolling over the structure is positioning, and the post-fight upgrade screen is where most of your "wanderburg how to consume villages" learning actually happens.
Module Priority for Mid-Game Growth
Not all modules are equal. A mid-game castle that stacks the wrong modules will grow wide but stay soft, and a soft castle gets one-shot by biome bosses. The table below is a community consensus priority list for module upgrades between consume #3 and consume #8:
| Priority | Module Type | Why It Matters | When to Take It |
|---|---|---|---|
| 1 | Forward Ram | Speeds up village consumption, lets you break walls while moving | After 2nd village |
| 2 | Side Ballistae | Clears garrisoned defenders so you take less damage per fight | After 3rd village |
| 3 | Armor Plates | Increases HP pool so you can survive elite camps and bosses | After 4th village |
| 4 | Scout Module | Reveals more of the map, reduces ambush risk | After 5th village |
| 5 | Harvest Module | Generates resources from passive nodes while you move | After 6th village |
The exact order will shift with your captain and artifact choices, but the principle holds: offense first (so you consume faster), then defense (so you survive longer), then utility (so you find targets faster). If you are looking for a deeper module breakdown, the castle design guide covers slot placement and stacking interactions in detail.
How to Chain Consumes Without Losing Momentum
The biggest mid-game mistake in a wanderburg survival run is stopping to repair after every village you consume, because repair is expensive in time, and time is the resource you cannot buy back once a biome timer is ticking. Two community-tested habits keep the consume chain's momentum going: only repair when you have actually dropped below 40% HP, and pre-plan your path so it rolls through passive regeneration nodes between villages so your castle enters the next fight closer to full HP without burning a turn at a repair site.
-
Only repair when below 40% HP. Above that threshold, your castle can take another fight, and another village is almost always within one screen.
-
Route your path through repair nodes. Some map nodes offer passive HP regeneration while you pass through. Planning your consume path to roll over these nodes between villages means you arrive at the next target closer to full HP without spending a turn.
A chained consume run feels completely different from a "fight-repair-fight" run, and the biome boss score screen makes that gap painfully obvious: a player who keeps the chain going through 6 to 8 villages usually rolls into the boss with a castle 30 to 50% larger than one who repaired after every fight, because each unspent repair turn is another turn of village resources, blueprints, and population stacked onto the keep. The "fight-repair-fight" loop stalls instead, since every repair action burns a turn that could have been a free consume, so by the time both players reach the same biome boss the chain runner is fielding extra wall segments, garrison slots, and a fully stacked production queue that the cautious player simply never built up.
Snowballing the Run: How to Win a Wanderburg Run
Survival tips only matter if they convert into a won run. Winning Wanderburg means reaching the late-game biome with a castle large enough to threaten the final boss, and that requires intentional snowballing, not just passive growth. A reliable benchmark is hitting roughly 12–15 consumed villages and 8+ upgraded walls by the time the event timer enters its final third; falling below that curve almost always means the late-game biome will outpace your recruitment capacity. Treat every early caravan and witch hut not as flavor but as a tempo investment, and chain-queue walls the moment your villager count crosses 6 so the snowball never stalls.
What Snowballing Actually Looks Like
A "snowballing" run in Wanderburg is one where each consume makes the next consume easier and faster. This is the practical answer to "wanderburg how to win a run." Snowballing is not about getting lucky; it is about sequencing your choices so your castle hits a critical mass around consume #5 or #6, after which the map opens up.
Watch for these three signals during your consume sequence—they confirm that your module picks and village routes are compounding rather than wasting turns: if villages fall in roughly eight to ten seconds once you hit consume #5, your damage scaling has crossed the threshold where tier-2 modules like Spiked Battlement or Siege Furnace start one-shotting minor structures. Sustained HP loss under 15% per fight means your wall HP and regen modules (Reinforced Gates, Mossy Rampart) are outpacing enemy burst, which is the real snowball metric. And when the module draft offers tier-3 upgrades instead of tier-1 replacements, the game's internal difficulty curve has already recognized you as a winning run and is compensating—so pivot hard only if two of these three are missing by village six.
-
You can break a village in under ten seconds.
-
You are taking less than 15% HP damage per fight.
-
New module choices are offering tier-3 upgrades, not tier-1 replacements.
A clean three-for-three read by the time you reach village six means the game's internal difficulty scalar has already downshifted for you, and most consume routes past that point become free wins; if you only hit two of three, treat the missing signal as a specific failure mode—slow village clears mean your early villages were over-prioritized at the expense of wall HP modules, high HP loss means you skipped Reinforced Gates or Mossy Rampart in your tier-1 draft, and a flat module pool means you need to pivot into a module-heavy route that forces higher-tier offers.
When to Pivot: The Three Pivot Points
Not every run goes to plan. Knowing when to abandon a route and reset your priorities is what separates good Wanderburg players from great ones. The early access guide covers starting routes, but the pivot rules below apply to any run:
| Pivot Trigger | What to Do | Why It Works |
|---|---|---|
| You hit consume #5 and still have tier-1 modules | Reset module path, take best available tier-2 | A tier-1 mid-game castle will lose to biome enemies |
| You take >50% HP damage on a small village | Skip next two villages, hunt repair nodes | A damaged castle attracts stronger enemy spawns |
| You find a fortress before consume #6 | Engage it only if you have a Forward Ram + Side Ballistae | Fortress fights without those modules almost always fail |
| You reach biome edge with <60% HP | Stop, repair to full, then cross | Biomes scale difficulty sharply on entry |
Late-Game Castle Composition
By the time you are pushing into the third biome, your castle should have a recognizable shape. Most winning runs reported by players on the r/WanderburgGame community settle into one of three compositions, each with its own strengths:
-
The Battering Ram: Heavy forward modules, high HP, slow movement. Best for breaking fortress walls but vulnerable to flanking enemies.
-
The Mobile Archer: Balanced side ballistae, mid HP, fast movement. Best for clearing villages quickly and repositioning out of danger.
-
The Hybrid: Two forward rams, four side ballistae, one armor plate, one harvest module. The most forgiving composition and the recommended default for new players.
The Hybrid is the safest "wanderburg how to win a run" template because it covers offense, defense, and resource generation in one build. Once you have a few wins under your belt, you can specialize into the Battering Ram or Mobile Archer for faster (but riskier) clears.
Why Most Runs Die in the First Biome
Most Wanderburg runs die in the first biome. Not because the enemies are unfair, but because of a handful of repeatable mistakes that show up in every death recap. This section is a checklist of what not to do, and how to fix the habit if you already have it.
Mistake #1: Chasing the Big Village First
The largest village on the map is almost never the correct first target. It has the most defenders, the thickest walls, and the longest travel time. New captains see the high reward and ignore the cost. The fix: always consume the closest village first, then plan a route to the next closest. Geography beats greed in the early game.
Mistake #2: Ignoring Biome Enemies
Every biome has roaming enemy patrols, and they will aggro on your castle if you roll into their line of sight while distracted by a village fight. The fix: keep your camera zoomed out enough to see incoming patrols, and never start a village fight unless the path behind you is clear. A pulled patrol during a consume will turn a winning fight into a losing one. For biome-specific enemy patterns, the biome enemies breakdown is a useful reference.
Mistake #3: Skipping Artifacts
Artifacts dropped by consumed structures and fortress kills are permanent across the run, and they stack with your captain's passive. Skipping them because you are in a hurry is one of the most expensive mistakes in the game. A single tier-2 artifact can be the difference between a one-shot from a biome boss and a survivable hit.
Mistake #4: Over-Upgrading One Module
Stacking five catapults on a starter castle feels powerful, but it leaves you with zero defense. The fix: cap any single module type at three slots until you have at least one armor plate. Diversity beats raw stacking in almost every run.
Mistake #5: Forgetting to Repair Before a Boss
Bosses are scripted, and they hit hard. Showing up to a biome boss at 50% HP is a coin flip, and the coin is loaded against you. Always repair to full before engaging any boss arena, even if it means losing thirty seconds of momentum.
Frequently Asked Questions
What is the fastest way to grow your castle in Wanderburg?
The fastest growth path is to chain three small villages in the first biome, prioritize a Forward Ram and Side Ballistae from the first two consumes, and skip every elite camp until your castle has at least four modules. This sequence typically takes a starter castle from three modules to six modules in under twelve minutes, which is the critical mass needed to start snowballing.
How do you consume villages efficiently in Wanderburg?
To consume a village efficiently, approach from the side with the thinnest wall, fire your offensive modules to break the wall, then roll through the central structure without stopping. The faster you complete the consume, the less counter-fire you take, and the more HP you preserve for the next fight. Chaining three to four of these in a row is the core of any "wanderburg how to consume villages" strategy.
Can you win a run without fighting any fortresses?
Yes, but it is harder. Fortresses drop tier-2 and tier-3 artifacts that significantly boost your castle, and skipping them means you rely entirely on village drops and captain passives. Players who skip fortresses typically need a Hybrid castle composition and at least seven villages consumed before the first biome boss. If you want the safer route, the fortress destruction guide walks through the minimum kit required.
What is the best captain for a first win?
The first captain you unlock is generally the most forgiving, because their passive tends to be defensive or resource-focused rather than conditional. For experienced players, the offensive captains with damage-scaling passives are faster but require cleaner execution. The beginner guide recommends starting with the defensive captain until you can reliably reach the second biome.
How long does an average Wanderburg run take?
A typical run takes 35 to 50 minutes, depending on biome progression speed and how many fortresses you engage. Winning runs tend to cluster around the 40-minute mark because players learn to stop over-farming and start pushing toward the final boss once they have a snowballing mid-game castle. The official Steam listing notes the game supports "mouse, keyboard, or controller," so input choice does not meaningfully change run length.