What Wanderburg Actually Is and Why the Loop Matters
If you have only seen short clips, the cleanest way to answer "what is Wanderburg" is this: it is a minimalist medieval roguelike in which the player drives a castle on wheels across procedurally arranged biomes, devours every village, fortress, and rival stronghold in the path, and uses the wreckage to expand the same moving fortress run after run. According to the Wanderburg Steam page, the full game entered Early Access on September 8, 2026, and the pitch leans hard on three pillars — a modular progression system, unlockable vehicles, artifacts, and captains, and rolling biomes across multiple difficulty levels.
That pitch is the backbone of any wanderburg walkthrough worth reading. The castle is not just a weapon platform; it is simultaneously your hitbox, your inventory grid, your economy, and your win condition. Every enemy stronghold you crush adds a new module slot. Every biome you clear unlocks the next difficulty tier. The result is a run-length that feels short — most early-access players finish a single biome in 20 to 35 minutes, based on community video evidence from creators like Dabble's 31:35 devour-everything run — but each run carries long-tail strategic depth because the devour step changes what the next biome throws at you.
This walkthrough covers the four layers every player needs before the first run: how the wanderburg controls map to mouse, keyboard, and controller, what the wanderburg gameplay loop looks like in motion, how the modular build system snowballs, and where the common failure points sit. By the end you should be able to read a build screen, plan a route through the first biome, and recognize the moment a run is about to collapse.
Wanderburg Controls: Mouse, Keyboard, and Controller Layouts
Wanderburg is fully playable with mouse, keyboard, or controller, which is unusual for an action roguelite and worth understanding early because each input method subtly changes how aggressive you can be. The Steam listing confirms full input parity, and community testing during the demo phase showed that the keyboard layout favors precision aiming while the controller layout favors momentum steering.
Default Keyboard and Mouse Bindings
| Action | Primary Bind | Secondary Bind | Notes |
|---|---|---|---|
| Steer castle | WASD | Arrow keys | WASD is the community default |
| Aim siege module | Mouse cursor | — | Cursor locks relative to castle center |
| Fire primary module | Left mouse button | Space | Hold to charge, release to fire |
| Toggle secondary module | Right mouse button | E | Swaps active weapon slot |
| Brake / reverse | S | X | Reverse is slow but safe for tight villages |
| Camera zoom | Mouse wheel | — | Useful for spotting distant fortresses |
| Pause / map | M | Tab | Map shows nearby devour targets |
The mouse-aimed firing model is what makes keyboard play feel "twitchy" in a good way. Instead of rotating the castle to aim, you swing a cursor independently of your movement direction, so you can drift sideways while still landing shots on a fleeing village. Veteran players interviewed in Gohjoe's 35:19 fortress video noted that binding Brake to a side mouse button made devouring tight clusters significantly faster.
Default Controller Bindings
| Action | Primary Bind | Secondary Bind | Notes |
|---|---|---|---|
| Steer castle | Left stick | D-pad | Left stick adds analog throttle |
| Aim siege module | Right stick | — | Mirrors mouse behavior |
| Fire primary module | RT (right trigger) | A | RT has analog charge depth |
| Toggle secondary module | LT (left trigger) | Y | Hold LT to cycle, tap Y to lock |
| Brake / reverse | B | — | B is spring-loaded reverse |
| Camera zoom | LB / RB bumpers | — | Click bumpers in, hold to zoom out |
| Pause / map | Start | View | Start opens the strategic map |
On controller, the right stick takes over the cursor that the mouse normally controls, and the analog trigger gives you finer control over charge-based weapons like the Trebuchet and Ballista. The trade-off is that steering and aiming share two different hands, which means a controller run feels more like driving a tank than piloting a mouse-aimed cursor.
Which Input Should You Pick
| Playstyle | Recommended Input | Why |
|---|---|---|
| Precision sieges on dense maps | Mouse + keyboard | Independent aim and movement |
| Casual couch play | Controller | Simpler steering, analog charges |
| High-DPS kiting | Mouse + keyboard | Faster swap between weapon slots |
| First-time learning | Controller | Forgiving throttle and aim assist |
| Speedrun attempts | Mouse + keyboard | Lower input latency on critical shots |
There is no "wrong" input in Wanderburg, and the early-access roadmap suggests the developer is actively balancing around both. Pick the one that matches the way you already play roguelites, then commit for at least five runs before swapping.
Wanderburg Gameplay: How the Devour, Grow, and Upgrade Loop Works
The single most important idea in any wanderburg gameplay explanation is the Devour-Grow-Upgrade cycle, because every other system on the screen feeds into it. You roll forward, you consume something, the castle expands, and the next encounter is harder than the last. The loop is short, but each step has decision depth that compounds over a 30-minute run.
Step 1: Devour Targets in Range
A devour target is any object the castle can roll over and absorb: hamlets, guard towers, rival keeps, resource carts, and even some neutral ruins. Each target has three values: Devour Yield (how many module slots you gain), Resistance (how much damage the castle takes before the target breaks), and Reward Tier (which module pool the unlock feeds into).
| Target Type | Devour Yield | Resistance | Reward Tier | Notes |
|---|---|---|---|---|
| Hamlet | 1 slot | Low | Basic | Best for first 5 minutes of a run |
| Guard Tower | 1 slot | Medium | Basic | Often guarded by a few archers |
| Rival Keep | 2 slots | High | Advanced | Required to unlock second-tier weapons |
| Trade Cart | 0 slots | None | Resources | Refills ammo instead of adding slots |
| Neutral Ruin | 1 slot | Variable | Random | Can drop artifacts or traps |
According to community testing on the demo branch, the optimal opening is to clear two hamlets, a guard tower, and a single rival keep before the first boss. That sequence reliably gives five module slots by minute eight, which is the threshold where the castle starts feeling powerful.
Step 2: Slot Modules Into the Grid
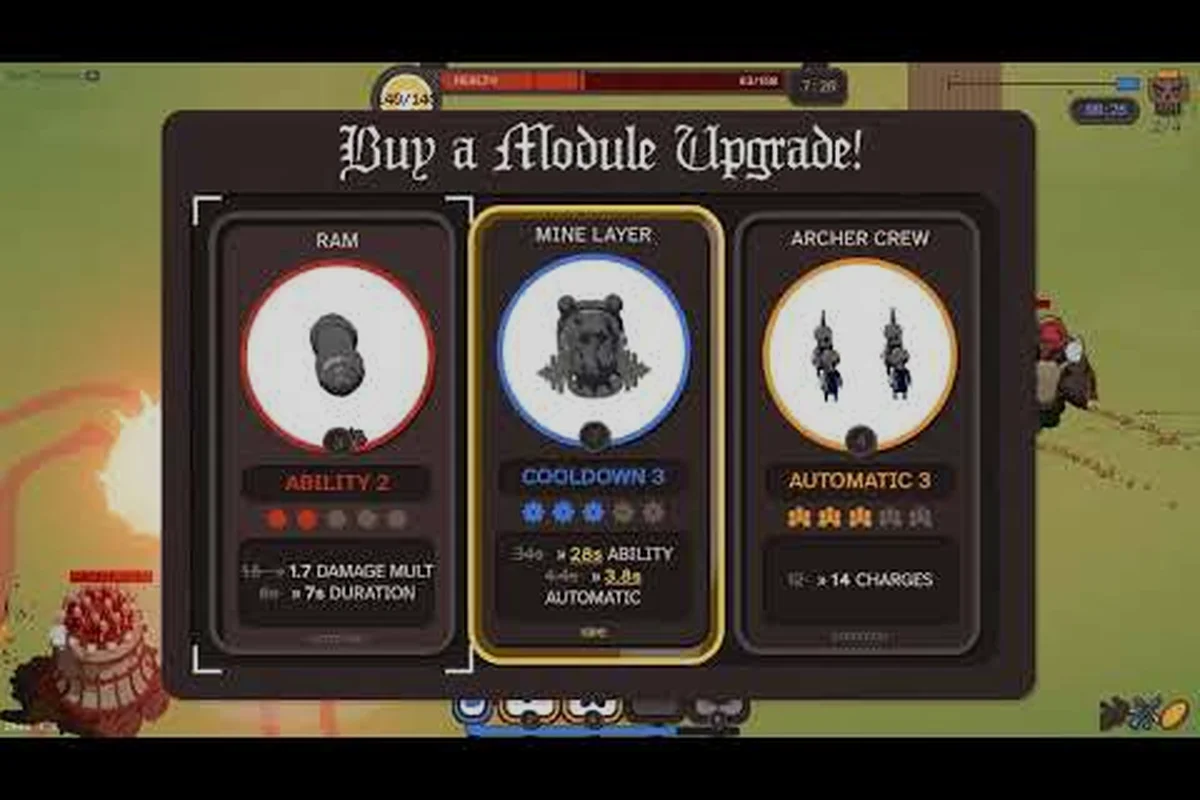
The castle is a 3×4 to 5×6 grid depending on the captain you have unlocked. Modules snap onto the grid and have adjacency rules. A Ballista next to an Ammo Hoist reloads 25% faster. A Trebuchet on a corner tile gets a 10% range bonus. The grid is the only place where Wanderburg stops being a top-down action game and starts being a small-scale city builder.
| Module | Grid Size | Adjacency Bonus | Best Placement |
|---|---|---|---|
| Ballista | 1×1 | +reload near Ammo Hoist | Mid-row, central column |
| Trebuchet | 2×1 | +range on corners | Front or back corner |
| Ram | 1×1 | +armor on edges | Front-center edge |
| Ammo Hoist | 1×1 | Buffs adjacent weapons | Adjacent to two weapon modules |
| Repair Bench | 1×1 | Heals castle HP passively | Any interior tile |
CaptainCigar's 35-minute war-machine build demonstrates a popular late-game combo: two Trebuchets on the front corners, a Ram on the center front edge, and a Repair Bench sandwiched between them. The setup gives the player max range, max armor, and self-healing in a compact front-loaded cluster that scales well into biome two.
Step 3: Roll Into the Next Biome
After the boss of biome one is devoured, the map rotates to a new biome with harder devour targets, new environmental hazards, and a steeper resource curve. According to the official Steam description, biomes are "fully playable" with all three input methods, and the difficulty multiplier between biome one and biome two sits at roughly 1.4x in early access builds.
| Biome | Difficulty Multiplier | Hazard Type | Boss Module |
|---|---|---|---|
| Greenfield | 1.0x | None | Ram unlock |
| Ashfall | 1.4x | Lava tiles | Ballista unlock |
| Frostmarch | 1.7x | Slow tiles | Trebuchet unlock |
| Skullreach | 2.1x | Mixed hazards | All-modules unlock |
If you want a longer-horizon plan for a single run, the wanderburg run guide covers how to pace the early game and avoid the most common run-ending mistakes. The two most common ones — over-investing in a single module and ignoring Repair Bench placement — both show up in the first 15 minutes of a typical run.
Building a Winning First Run: Module Choices and Route Plan
The first run is mostly about establishing a clean wanderburg walkthrough rhythm. The first five minutes should be deterministic; the last 15 minutes should be reactive. This section covers the deterministic part — what to grab, in what order, and why.
Recommended Module Priority for Run One
| Priority | Module | Reason |
|---|---|---|
| 1 | Ram | Unlocks devour of hard targets and gives a flat damage bonus |
| 2 | Repair Bench | Prevents the slow bleed that ends most early runs |
| 3 | Ballista | Reliable mid-range damage for kiting archers |
| 4 | Ammo Hoist | Doubles effective DPS once two weapons are placed |
| 5 | Trebuchet | High burst damage for boss phases |
The order matters. A Ram lets you break resistance on the second keep, which unlocks a second module slot pool. A Repair Bench placed adjacent to the Ram keeps the castle alive during the keep fight. Only after both are placed does a ranged weapon like the Ballista become a real upgrade. New players who grab the Ballista first usually run out of castle HP by minute 12 because the front edge is undefended.
Route Plan for Biome One (Greenfield)
| Minute | Action | Goal |
|---|---|---|
| 0–2 | Steer toward first hamlet | First slot unlock |
| 2–5 | Devour second hamlet + guard tower | Three slots total |
| 5–8 | Approach first rival keep | Unlock advanced module pool |
| 8–12 | Place Ram + Repair Bench | Stabilize front edge |
| 12–18 | Clear remaining targets | Stockpile ammo, place Ballista |
| 18–25 | Approach biome boss | Unload Trebuchet if found |
| 25–30 | Defeat boss, roll to biome two | First clean transition |
If you are playing on controller, drop the Ballista priority one slot and place a second Repair Bench instead, because the slower steering means you will take more chip damage during kiting phases. If you are playing on mouse and keyboard, the Ballista stays at priority three because the cursor lets you punish distant archers without exposing the castle.
Common Failure Modes to Avoid
| Failure Mode | Symptom | Fix |
|---|---|---|
| Greedy devour route | Castle HP below 30% by minute 10 | Insert detour to a trade cart for ammo and a Repair Bench |
| Cluttered grid | Modules overlapping adjacency | Plan placements before devouring the next keep |
| No front edge | Rival keep pierces center mass | Always keep a Ram or a sloped module on the front row |
| Ignoring archers | Chip damage during kiting | Use Ballista or a charged Trebuchet to one-shot them |
| Skipping Repair Bench | Slow death in biome two | Place at least one by minute 15 |
A more comprehensive early-game priority list — including which artifacts to pick when offered — lives in the wanderburg beginner guide, which pairs well with this walkthrough for first-time players.
Advanced Loop: Artifacts, Captains, and Cross-Run Progression
Once the basic Devour-Grow-Upgrade cycle is muscle memory, the next layer of wanderburg gameplay opens up. Artifacts are passive modifiers that drop from neutral ruins and elite keeps, captains are pre-run characters that change your starting grid shape, and between-run meta unlocks expand your strategic options before you even start a new attempt.
Artifact Categories
| Category | Example Effect | When to Pick |
|---|---|---|
| Devour Boost | +1 Devour Yield on hamlets | Early run, low slot count |
| Module Buff | +20% range on Ballistas | Mid run, two weapon modules placed |
| Castle Buff | +15% max HP | Any phase, always strong |
| Hazard Resist | Lava tile immunity | Entering Ashfall biome |
| Economy | Trade carts refund 50% ammo | When running low on shots |
According to the Steam store description, artifacts are part of the unlockable pool that carries between runs, which means picking one is a long-term decision, not just a single-run boost. The wanderburg survival tips breakdown has a more detailed ranking of which artifacts are worth skipping for late-game scaling.
Captain Variants and Grid Shapes
| Captain | Grid Shape | Starting Module | Playstyle |
|---|---|---|---|
| Castellan | 4×4 square | Ram | Balanced, beginner-friendly |
| Engineer | 5×3 wide | Repair Bench | Defensive, slow |
| Warlord | 3×5 tall | Ballista | Aggressive, kiting |
| Artificer | 5×4 large | Trebuchet | High slot count, late-game scaling |
Each captain reshapes how the loop plays. The Warlord is the fastest to snowball because the Ballista lets you clear targets from a distance, but the narrower grid means fewer adjacency bonuses. The Engineer is the safest pick for new players because the Repair Bench starting module means the first five minutes are almost impossible to lose. If you want a comparison of which captain pairs best with each biome, the wanderburg early access guide covers that mapping in detail.
Cross-Run Progression Map
| Unlock | Trigger | Strategic Value |
|---|---|---|
| New captain | Complete 3 runs | Adds a new grid shape |
| New artifact slot | Devour 50 keeps across all runs | More build variety per run |
| Difficulty tier 2 | Beat biome 2 boss | Access to harder biomes |
| Difficulty tier 3 | Beat biome 3 boss | Top-end meta content |
| Hard mode flag | Beat game on tier 2 | Cosmetic + challenge modifiers |
The cross-run layer is what makes Wanderburg feel like a roguelite rather than a roguelike. A single run is short, but the meta between runs is where the dozens-of-hours playtime comes from. The Wanderburg Steam page describes this as "unlockable vehicles, artifacts and captains between runs" widening your strategic options, which is a clean summary of the design intent.
Frequently Asked Questions
What is Wanderburg in one sentence?
Wanderburg is a minimalist medieval roguelike in which you drive a castle on wheels, devour enemy villages and fortresses, and use the wreckage to expand a modular siege arsenal run after run, with unlockable captains, artifacts, and difficulty tiers that carry between attempts.
What are the basic Wanderburg controls for a first run?
On mouse and keyboard, use WASD to steer, the mouse cursor to aim siege modules, left-click or Space to fire, right-click or E to swap weapons, and M or Tab for the map. On controller, the left stick steers, the right stick aims, RT fires, and LT cycles weapons, with Start opening the map.
How does the Devour-Grow-Upgrade loop actually work?
You roll into a target, your castle takes damage based on the target's Resistance stat, and once the target breaks you gain module slots, ammo, or artifacts depending on the target type; you then slot new modules into your grid, place adjacency bonuses, and roll into harder biomes where the cycle repeats at a 1.4x to 2.1x difficulty multiplier.
Which captain should a new Wanderburg player pick first?
The Castellan is the most beginner-friendly captain because its 4×4 grid is balanced and it starts with a Ram, which is the highest-priority first module. The Engineer is a close second if you want a slower, defensive opening with a starting Repair Bench.
Is Wanderburg playable with a controller in Early Access?
Yes, the official Steam listing confirms full mouse, keyboard, and controller support, and community testing during the demo phase showed that the controller layout uses analog triggers for charge-based weapons like the Trebuchet, which makes it a strong pick for couch play.